Scratches, Dings, & Dents: Improving Surface Inspection
Machine vision is a vital tool for optimizing and monitoring industrial processes. Automated imaging systems enable manufacturers to inspect products at high speed, capturing and storing information on the production process. Used in a wide range of applications—from barcode reading to product inspection to test and measurement—machine vision systems are a critical part of detecting defects and errors in manufacturing environments.
Hosted by the editors of Tech Briefs Media Group, a new 60-minute technical webinar features presentations by three top experts in the machine vision field, including Radiant Vision Systems Vice President of Sales - Surface Inspection, Hubert Kostal, Ph.D. In the broadcast, Kostal discusses the use of photometric-based vision systems (Radiant's Advanced Vision family) for surface inspection of devices such as smart phones and laptops.
There are multiple possible defects that can mar the appearance of a device—and affect a customer’s perception of quality:
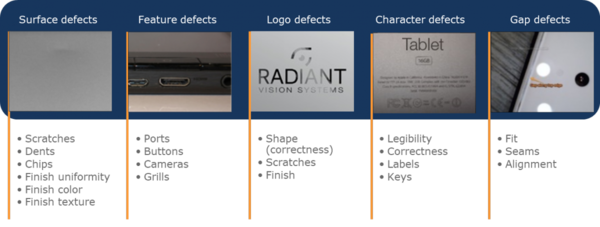
Some of the types of surface and “fit and finish” defects that can be found on electromechanical products, as a result of material or assembly issues.
Customers of today’s consumer electronics devices expect a flawless product out of the box. Scratched, dented, and otherwise imperfect products can result in costly returns and warranty claims. Even worse, defects may damage your brand’s reputation and future business. Quality control regimens to prevent and detect surface defects have typically relied on human inspectors. Human visual perception is more discerning and precise than machine vision; human inspectors can apply their acute vision, and their ability to make immediate judgments, to detect subtle random or surface defects.
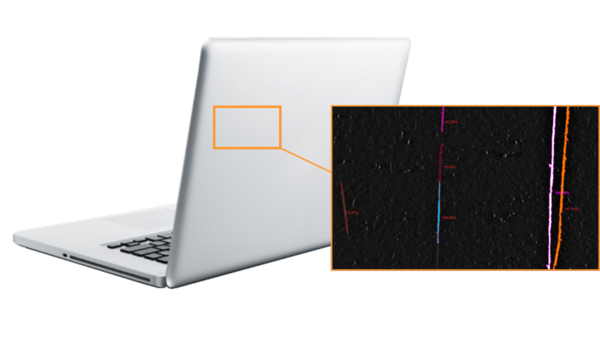
Surface scratches detected on the back of a laptop assembly using photometry-based imaging.
However, the faster the production rate, more complex the product, or the more obscure the defect... the more difficult it is for humans to keep up with throughput demands while maintaining a consistent standard of quality. Automated (machine) inspection systems provide greater speed and repeatability, but the visual acuity available in traditional machine vision systems just can’t match human perception.
By contrast, imaging photometers are specifically engineered to measure and detect subtle variations of light uniformity across illuminated components. Tested in a number of machine vision applications, Radiant ProMetric® Imaging Photometers can match the discernment and precision of the human eye.
Photometry-based inspection systems like these combine the speed and consistency of automation with the sensitivity of human vision, exceeding the capabilities of traditional machine vision cameras. Engineered for light measurement and detecting subtle contrast variations in high-resolution spatial images, Radiant’s Advanced Vision solutions leverage advanced imaging technology ideally suited for detecting anomalous features on surfaces and grading these defects based on their location, scope, and severity.
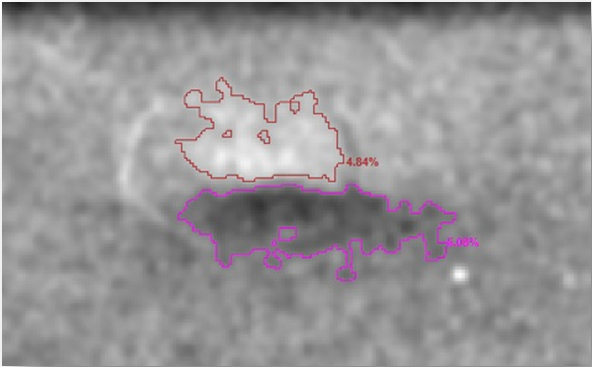
The length and width of a dent can be measured to determine if the device passes or fails.
Photometry-based inspection systems can detect random defects: unknown defects that appear in unknown locations on a part. By taking a wide-area image of a device, these systems can perform uniformity checks to detect hairline scratches, subtle dents, or even fingerprints or debris on device surfaces.
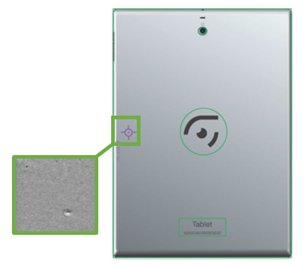
Dent detected on the back of a tablet based on non-uniformity of surface contrast.
Radiant’s Advanced Vision systems can provide all the benefits of automated cosmetic inspection, including objective analysis and quantifiable results, along with capturing the data needed for error tracking to improve production and operations. An extensive set of machine vision inspection tools are available for production-level monitoring and pass/fail test sequencing using Radiant software.
Watch the webinar, "Understanding Machine Vision for Industrial Inspection" to learn more about the application of photometry-based Advanced Vision for cosmetic surface inspection. The webinar's speakers cover various machine vision topics:
- How to ensure traceability of machine vision inspection data using auto ID, like barcodes and symbols
- How to use advanced vision for surface inspection on final assemblies to detect subtle scratches, dings, dents, and particles
- How to choose optical components that provide the power for high-caliber image-based inspection
Dr. Kostal’s presentation on surface inspection begins at 17:40 in the recording, and the Q&A session, with further discussion of the topic, begins at 50:40.
Join Mailing List
Stay up to date on our latest products, blog content, and events.
Join our Mailing List