When to Apply Photometry-Based Inspection to Maximize ROI
Absolute product quality has become a prerequisite to compete in a number of industries. Standard machine vision inspection systems are inadequate for detecting the subtle issues in high-end products that now dictate a manufacturer’s brand reputation. More sophisticated inspection technology is needed to replicate the acuity of the human user to see defects and anomalies. Advanced imaging solutions—such as scientific-grade photometry-based systems—offer the ability to inspect low-contrast regions in extreme detail for detection and classification of the subtlest variabilities noticeable to the human eye. Although there is an investment to apply advanced systems like these, the ROI of photometry-based systems is justifiable in any operation where the risk of escaped defects and production inefficiency is a great-enough (and costly-enough) concern.

Justifiable Criteria for Integration of a Photometry-based Inspection System:
- Human inspectors are unable to consistently find, identify, and qualify defects, either due to throughput demands (speed) or product features (complexity).
- The rate of error (escapes) must be less than 1%.
- Product complexity currently requires repeat inspections by multiple operators on the line.
- Shift changes or personnel challenges cause undesired line downtime.
- Objective and auditable data must be acquired for production traceability.
- Results must be reproducible across multiple lines or facilities to ensure equivalent production performance.
- Quantifiable defect trending for complex defects would enabled the reduction of operational inefficiencies.
- Multiple technologies are currently employed to solve independent inspection challenges that could be solved by a single photometry-based system
|

|
|
A smart watch (above) and “smart” fridge (below) featuring integrated interactive touchscreen displays. |
|

|
As manufacturers invest more resources into quality assurance to safeguard competitive advantage in their markets, the cost to integrate photometry-based systems for product quality inspection is becoming commensurate with product value. This is especially true in industries where assembly verification, display measurement, and surface inspection must all be performed for product quality—a growing need as more products enter the “high-tech” space. Just think of the number of devices today that feature display interfaces, including phones, watches, automobiles, and even household appliances. Offering spatial imaging for comprehensive device measurement using all visible data points, photometry-based imaging systems accommodate the greatest range of display screen sizes and technologies, including LCD, OLED, and projection-based devices.
Photometry-based imaging offers advantages over traditional machine vision systems, combining high resolution, broad dynamic range, and low image noise to detect defects that other systems miss, such as those in low-contrast regions, or minute details on complex assemblies. Radiant’s photometric systems are correlated to human visual perception, identifying and analyzing the subtlest defects noticeable in assemblies and on displays and surfaces.
Radiant remains a market leader in display test and measurement for quality control in both R&D and production settings. With the addition of advanced machine vision tools to our product line, Radiant provides a single, configurable platform that can be efficiently employed to evaluate total device quality—from the inside out.
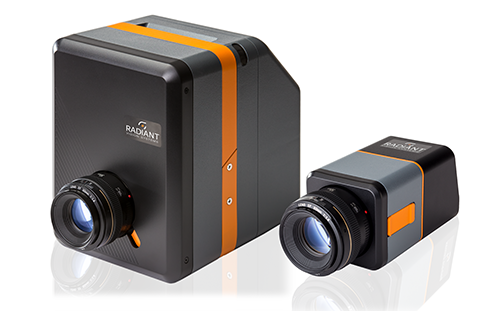
Radiant’s flexible ProMetric® imaging systems can be equipped with tools that provide:
- Standard photometric light & color uniformity and gradient measurements
- Identification of particle defects, pixel defects, lines, and scratches
- Mechanical and dimensional machine vision inspections like measurement, point-of-interest location, and presence/absence
- And more...
These tools work in sequence to provide real-time pass/fail output based on user-defined tolerances for defect severity and scope of defects as compared with the overall size or appearance of assemblies and surfaces. Radiant’s inspection software also offers auto-alignment capability for automatically detecting points of interest on a part, which eliminates the need for precise display positioning during testing and increases the accuracy of tests run on the line.
Using software to gather and classify defect types over time, a ProMetric photometry-based inspection solution can report out quantifiable and actionable data to machines and operators to detect trends. Operators can use this data for process improvements and maintenance, locating and resolving points in production that may be causing inefficiencies or damage to products during assembly and handling.
Watch a video of our photometry-based assembly verification station performing real-time QA for internal device assemblies.
Photometry-based Inspection Examples:
Surfaces:


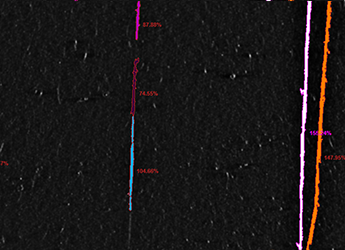
Example 1: Scratches identified by a photometry-based imaging system based on contrast ratios relative to a device background.


Example 2: Dent detected by photometry-based imaging system based on contrast variations caused by the indent’s shadow.
Displays:


Example 3: Light mura in an illuminated flat panel display as detected by uniformity analysis using a photometric imaging system.


Example 4: Surface defects on a tablet (smudges or fingerprints) as detected by a photometry-based imaging system, using similar evaluation techniques to illuminated display uniformity testing.
Assemblies:


Example 5: Incorrect routing (left image) of cable over plastic guide, versus correct cable routing (right image) as detected by a photometry-based imaging system.


Example 6: Incorrect alignment of connector (left image), versus correct connector alignment (right image) as detected by a photometry-based imaging system.
Keyboards/Keypads:

Example 7: Photometry-based keyboard inspection for presence and position of keys using point-of-interest definition.

Example 8: Incorrect gap width and alignment of key in keyboard frame, as measured by a photometry-based imaging system.
About Radiant ProMetric® Imaging Systems
The Radiant Vision Systems ProMetric family of imaging colorimeters and photometers is designed to address high-volume inspection of devices requiring absolute quality in assembly, surface quality, and light & color accuracy. ProMetric cameras are photometry-based inspection systems engineered for light measurement and calibrated to simulate human perception of light and color. They feature extremely high-resolution, scientific-grade image sensors. These sensors capture pixel-level measurements of assemblies and displays, inter- and intra-character luminance measurements, uniformity inspection for unpredictable errors in unprogrammed locations, and precision classification of surface defects (such as dents, scratches, and smudges) using the camera's extremely high dynamic range (above 59 dB). These systems can detect subtle differences in contrast—in displays or product surfaces and assemblies—making determinations about the type and scope of defects that result in actionable errors, while bringing speed, objectivity, repeatability, and quantifiable data to production.
Available with both photometric and machine vision tools within Radiant software, ProMetric inspection systems enable manufacturers from electronics to automotive industries to integrate the same turnkey system in display measurement, assembly verification, surface inspection, view angle performance, and dimensional gauging. Radiant imagers meet the requirements of high-speed production operations, combining the benefits of automation with the accuracy of human visual perception.
See the Difference:
Let us help you achieve absolute quality in lights, displays, surfaces, and assemblies with photometry-based inspection solutions.

Explore Advanced Imaging Solutions from Radiant
Join Mailing List
Stay up to date on our latest products, blog content, and events.
Join our Mailing List
