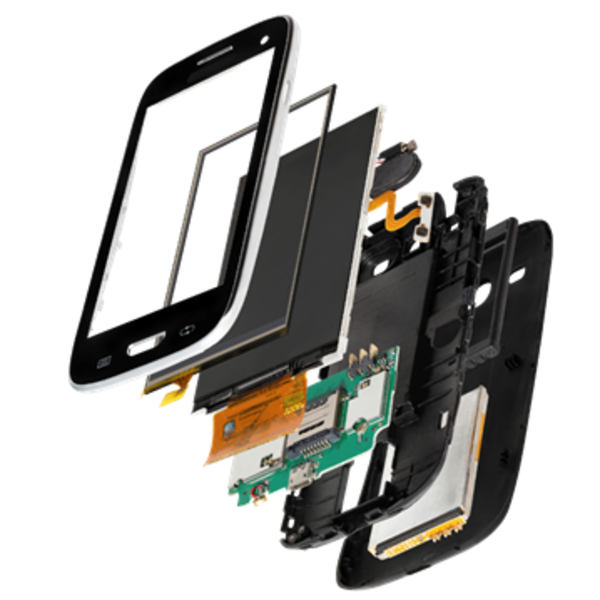
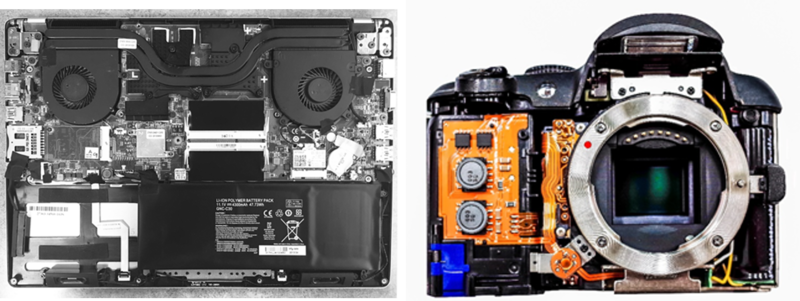
The more complex an assembly, the greater the chance an error will occur during production—and, the more challenging it becomes to visually verify assembly integrity. Standard machine vision systems (commonly offering one- to five-megapixel sensors) are unable to capture images at a high enough resolution to detect all defects in a complex assembly such as an electromechanical device. Even when higher-resolution imaging is possible, a machine vision system must be programmed with static points of interest to know where to look for defects, which requires advanced knowledge of defect locations and a consistent production environment where parts do not move or change.
For these reasons, manufacturers have turned to human inspectors for complex assembly verification of high-value devices, relying on an inspector’s heightened visual acuity and excellent judgment to identify and grade critical defects. However, human inspectors make inconsistent determinations from person to person or day to day, do not provide repeatable, actionable data to enable traceability or automation, and are easily fatigued when studying intricate arrays and configurations of components for extended lengths of time.
The superior resolution and optical sensitivity of ProMetric® Imaging Colorimeters and Photometers enable Radiant automated visual inspection solutions to detect even the slightest, low-contrast defects in assemblies and surfaces. Calibrated to replicate human perception of light and color, these imaging solutions match human inspection for discerning subtle but critical variations, while providing the benefits of automation for superior speed, precision, repeatability, consistency, and quantification of defects in complex inspection environments. Minute errors in electronic and mechanical assembly, randomly-occurring scratches, dings, and dents, and even embedded particles can be detected and prevented using Radiant cameras and camera-based inspection systems to ensure the absolute quality of high-value, high-risk products from electronics to medical devices.
Complex assemblies require inspection of a variety of small, subtle component features.
Internal Components
Screws, Connectors, Cables, and Components
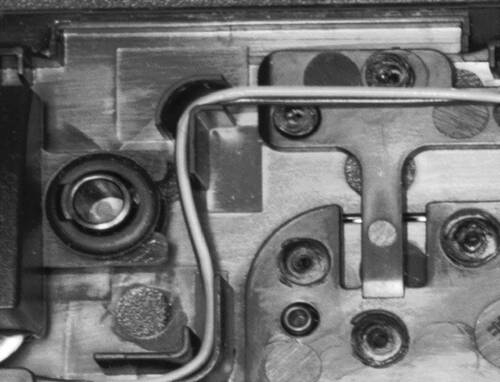
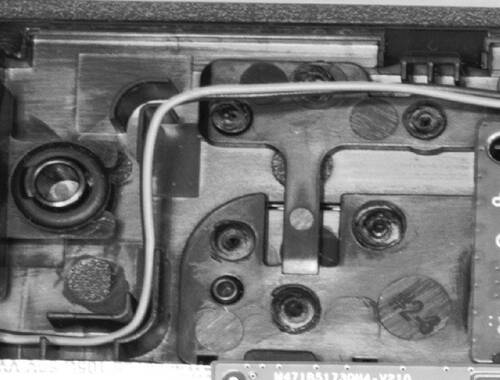
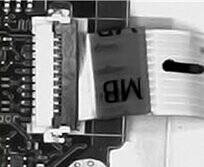
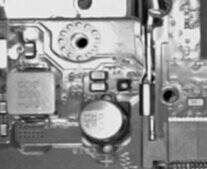
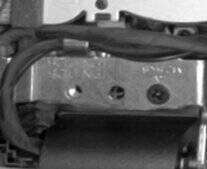
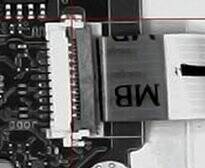
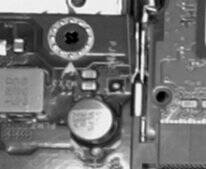
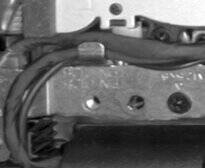
Smart devices, computers, and automotive assemblies require precise and complex configurations of components to ensure proper form and function. Inspection standards are high. Yet even if a product passes functional testing, the slightest error in cable routing, missing screws, or connector misalignment can drastically reduce a product’s lifecycle and result in latent errors that may lead to product failure as it is used by the consumer over time.
Radiant solutions for electronic assembly inspection combine a ProMetric® Imaging Photometer, external lighting, and software to image and inspect complex assemblies in-line during production. Employing a range of machine vision software tools for feature location, presence/absence checks, measurement, and more, Radiant’s photometry-based inspection technologies surpass machine vision system performance by leveraging the superior resolution and dynamic range of Radiant’s ProMetric imaging hardware.
Since Radiant photometers are scientifically calibrated for light and color measurement, they can identify and evaluate the subtlest imperfections in electronic assemblies noticeable to the human eye, but with greater speed and objectivity than human inspectors. Our photometers can detect the greatest range of contrast variances within an image (such as a dark screw on a dark surface, or a white wire on a light surface) and evaluate anomalous contrast differences within a wide area that may indicate damaged or defective components.
Data for Trending and Quality Improvement
Using automated inspection to acquire quantifiable data on electronic assembly defects, Radiant systems allow manufacturers to analyze trends regarding where and when defects occur, which may indicate a problem at an earlier stage of production, and enable data-driven operational improvements that support lean production. Radiant solutions are also ideal for detecting potentially latent defects before products are fully assembled and closed, preventing future damage and degradation and ensuring customer satisfaction and reducing warranty costs.
Pass: Cable is routed around guide.
Fail: Cable is loose from guide.
Additional Examples:
| Connector Alignment | Screw Presence | Cable Routing |
|
|
|
|
|
|
|
|
Final Assemblies
Inspect External Components and Finishes
Once electronic components are fully assembled and devices are sealed, mechanical assembly inspection verifies the integrity of the final product for functionality, consumer use, and overall quality. Employing automated visual inspection at this stage confirms that unintended damage, misalignment, or mislabeling has not occurred during final assembly operations.
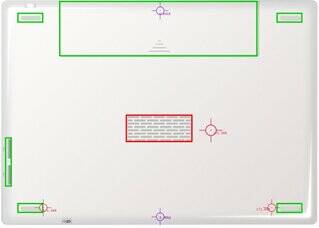
Automated inspection also prevents any further damage to product assemblies that may be caused during handling by human inspectors before products ship. Visual inspection systems may be used to check the placement of device back plates, bezels, glass, and other exterior surfaces; the alignment of cameras and connectors relative to apertures in device housing; the position and placement of keys on a keypad; the presence or position of labels and printed information on a product surface; and much more.
High-Resolution Imaging to Detect Subtle Defects
Combining extremely high-resolution imaging and grayscale sensitivity, Radiant imaging photometers can capture superior levels of detail and evaluate contrast ratios within images to ensure the most precise and accurate mechanical assembly inspection—down to less than a millimeter measurement. Hairline gaps between device surfaces, components, and apertures are easily detectable and measured based on calibrated tolerances.
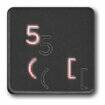
The high dynamic range of Radiant's imaging systems can detect subtle variations in surface reflections of light, allowing you to check for the presence of low-contrast materials such as tiny glass lenses within smart device cameras. While the position and presence of text, logos, and labels are easily verifiable, our systems can further analyze the quality of text and symbols using optical character recognition (OCR) and verification (OCV) to ensure print quality, legibility, and consistency.
Calibration for Consistency
All Radiant photometers are calibrated based on NIST-traceable samples or internal process tolerances, ensuring that all cameras on the line—or from one line to the next—image and evaluate products using the same standard measurement criteria. This consistency enables product assembly data to be traced across lines, giving you the assurance that all inspection systems will produce identical data in the same conditions. Calibration also guarantees that all products assembled on various lines adhere to a common standard of brand quality, preventing sub-par products from escaping into the marketplace, risking damage to your brand reputation.
Feet, connectors, and battery cover are present, but center component is missing.
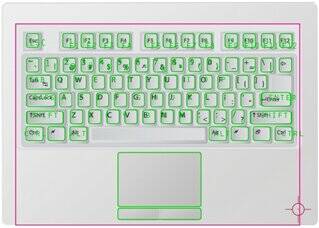
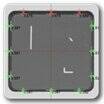
Keys on keyboard present and accurate, but there is a surface defect to the lower right.
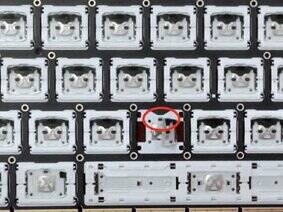
Defect detected on keyboard frame.
Complex Arrays
Detect Minute Defects in Complex Assemblies
Although a wide variety of defects are easily detectable to the human eye, the accuracy of human inspection decreases precipitously as the complexity of a surface or assembly increases. Defects on flat products like keyboards and keyboard frames that exhibit visual patterns ranging from complex arrays to entirely random features are more likely to be missed by human inspectors, who are easily fatigued by scrutinizing parts with a high degree of detail and a variety of contrasts and colors within a small area. However, catching minute defects in complex arrays is critical for preventing defects in subsequent assemblies.
Automated visual inspection solutions from Radiant capture extremely detailed images of complex parts thanks to the high resolution and high dynamic range of Radiant’s imaging photometers. Using single- or multi-camera integrations, manufacturers can capture and use several extremely high-resolution images to find minute defects precisely and quickly.


